Short-term integration of Manifest Builder
Goals + Requirements
The purpose of this project is to
- Integrate the Manifest Builder into the Devhub area.
- Intercept developers as they submit an app and encourage them either to create a manifest file or to validate an existing manifest file.
Requirements:
- Developers should have a quick/easy way to get to the Manifest Builder from the Submit App flow.
- Developers should have a quick/easy way to get to the App Validator from the Submit App flow.
- Developers should have a central page inside Devhub from which to access developer tools
- Developers do not need to be logged in to access and use the Manifest Builder. Design should encourage developers to sign in/up however.
- Developers can create a new manifest file using the Manifest Builder.
- Developers can import (and then edit) an existing manifest file using the Manifest Builder.
- Developers can download the generated manifest file for use as they see fit, for example, to test their app or to include in an app submission.
See the short-term prototype for the Manifest Builder.
- The Manifest Builder prototype was developed for the longer-term Devhub project. It has been modified to work for this shorter-term project. So you will see differences between it and the prototype for the longer-term project.
- Note that this document will be the source of truth for content/copy for the shorter-term project. Anything here supercedes the content/copy in the short-term prototype.
User Flow
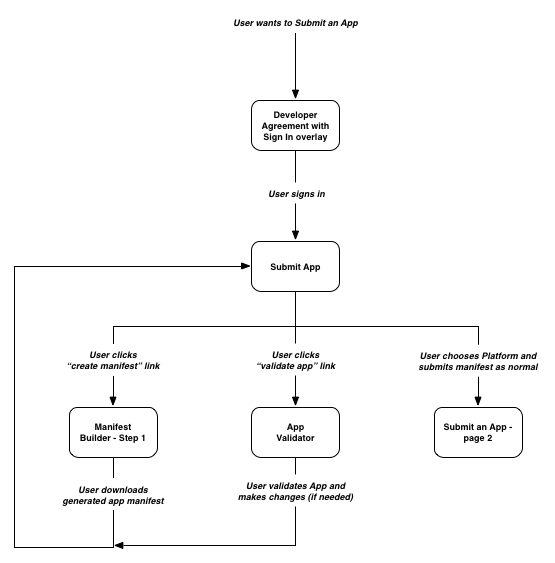
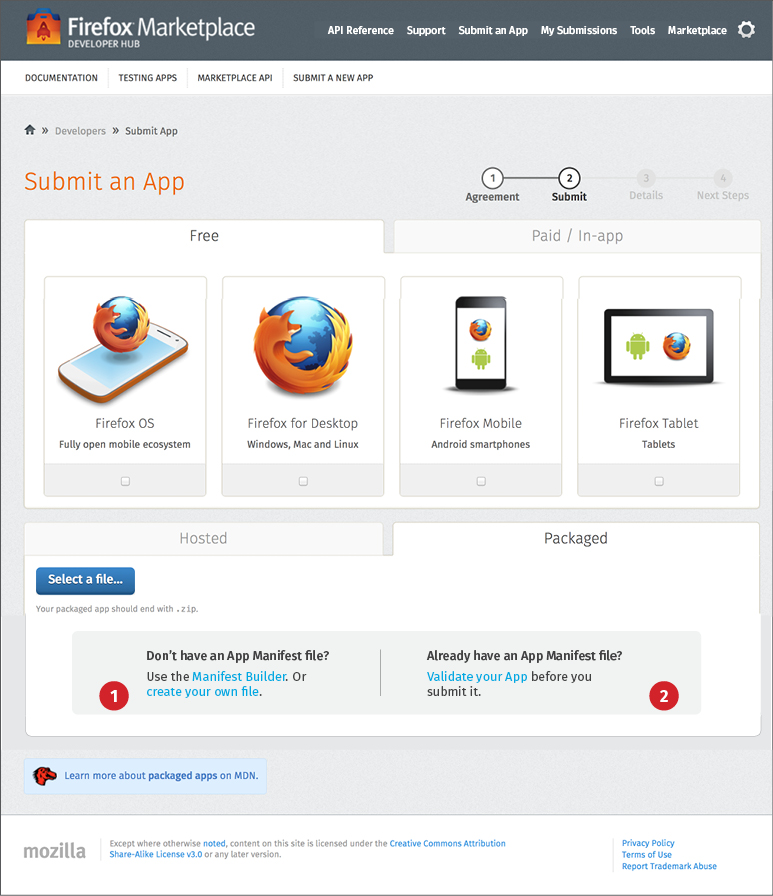
Submit an App - Hosted

Current URL: https://marketplace.firefox.com/developers/submit
We want to intercept developers here to either create a manifest file or validate it.
- Create Manifest. First link goes to Manifest Builder. Second link go to MDN App Manifest page.
- Validate Manifest. Clicking goes to the App Validator (Validate App).
Submit an App - Packaged
Current URL: https://marketplace.firefox.com/developers/submit
We want to intercept developers here to either create a manifest file or validate it.
- Create Manifest. Same as for Packaged.
- Validate Manifest. Same as for Packaged.
Validate an App
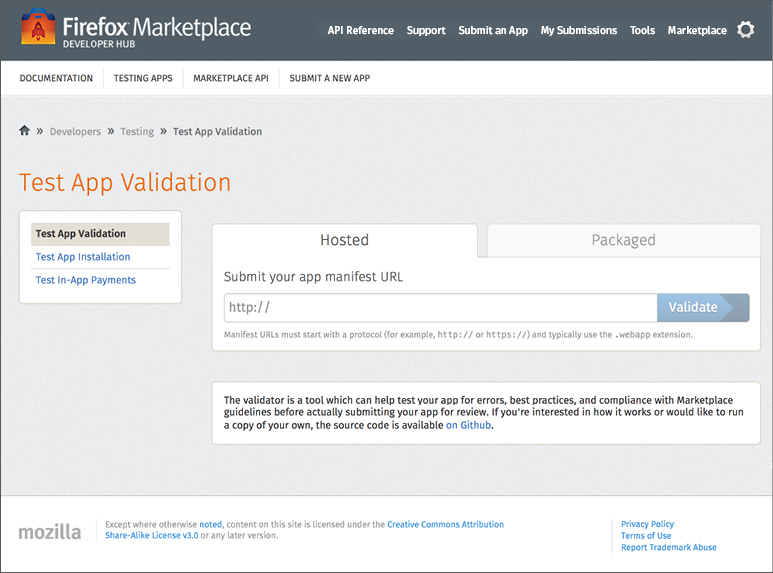
Current URL: https://marketplace.firefox.com/developers/validator
For reference only - no changes to this page.
Tools (new page)
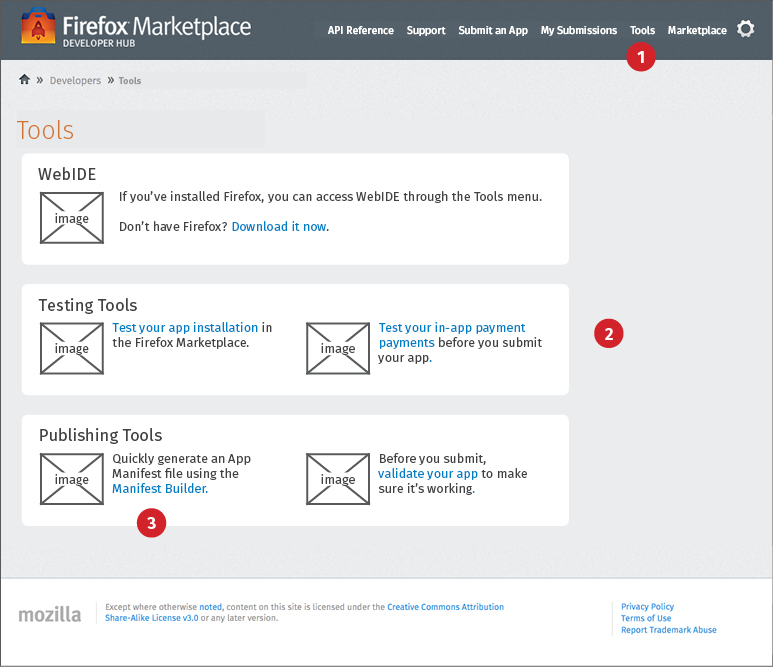
This is a new page within Devhub that will provide links to developer tools and/or content about developer tools.
- New Nav Item. Add new nav item -- Tools. Links to this new Tools page.
- Links to Tools. Provide links to web-based tools and/or information about other tools like WebIDE.
- Link to Manifest Builder. Goes to Manifest Builder.
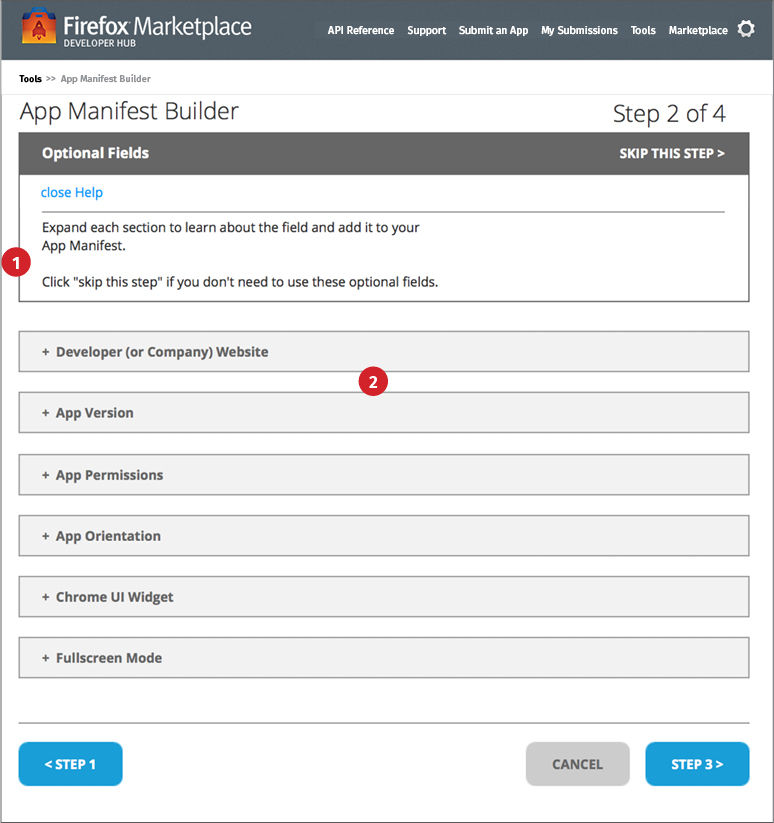
Manifest Builder - Navigation
This is a new page within Devhub that will provide links to developer tools and/or content about developer tools.
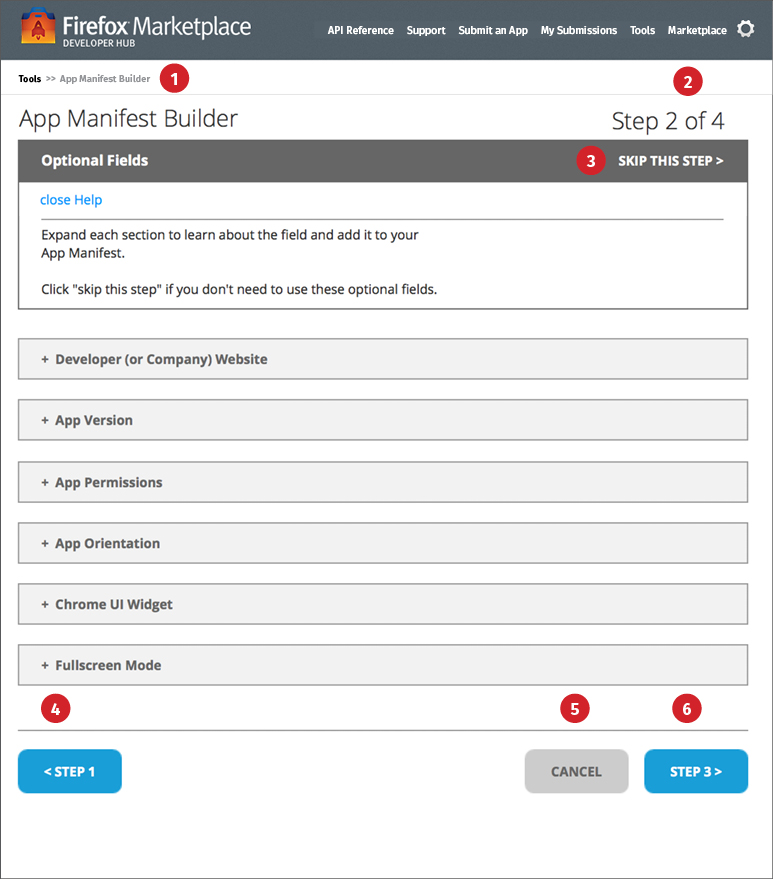
- Breadcrumb. Manifest Builder lives in the Tools area, so this is the breadcrumb.
- Step X of Y. Display Page X of Y on all Manifest Builder pages.
- Skip Step. User can skip Step 2 and Step 3 (because all fields are optional). Clicking advances to the next step of Manifest Builder.
This option is not available on Step 1.
- Previous Step. Click to return to previous step. Returning to previous step displays all selections and data entered that user had previously made on that page.
Note that this option is not available on Step 1.
- Cancel. Click "Cancel" to return to the page from which developer invoked Manifest Builder. Clears all data entered into Manifest Builder.
- Next Step. Click to advance to next step of Manifest Builder.
Note that this option is not available on Step 4.
With the exception of Step 1, user can complete all, some, or none of the fields. So advancing has no error conditions - except for Step 1.
On Step 1: all fields must be completed in order to advance. If a field is not completed, open the accordian and return error (see Required Field Errors).
Manifest Builder - Help Panel Open
This is a new page within Devhub that will provide links to developer tools and/or content about developer tools.
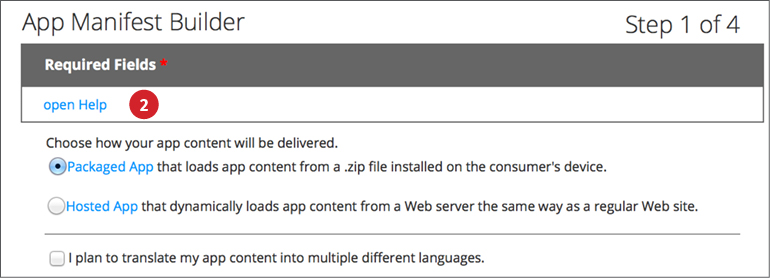
- Help Panel. On each page, Help panel is open by default.
Click to close (see Help Panel - Closed below).
This panel works same way on all Manifest Builder pages (though content differs per page).
Manifest Builder - Help Panel Closed
- Help Closed. Showing Help in closed state. Click "open" to re-open the Help panel.
Manifest Builder - Accordion Behavior
- Accordions. Accordions are closed on page load for all Manifest Builder pages.
Throughout the Manifest Builder, only one accordion can be open at a time.
When one is clicked, it opens the requested accordion and closes any other open accordion.
The only exception to this rule happens on Step 1, if user tries to advance without completing 1 or more required fields. In this case, open all the offending accordions and show errors as described in Required Field Errors.
- External Links. See External Links below
Manifest Builder - External Links
- External Links. Throughout the Manifest Builder, content will contain links to MDN (and other external) content.
For MDN links, clicking should open appropriate page and jump to requested content, e.g., "title" on the MDN App Manifest page.
Consider launching these in a new tab/window, so user keeps his place in the Manifest Builder.
Manifest Builder - Data Persistence
- Data Persistence. Entered data should be persisted across pages.
E.g., if user advances to next step, and then returns to a previous step, data in the accordions should be filled with the previously entered data.
If the user is not logged in and tries to navigate away from the Manifest Builder, encourage user to sign in/up to save their work. Design TBD.
Manifest Builder - Required Field Errors
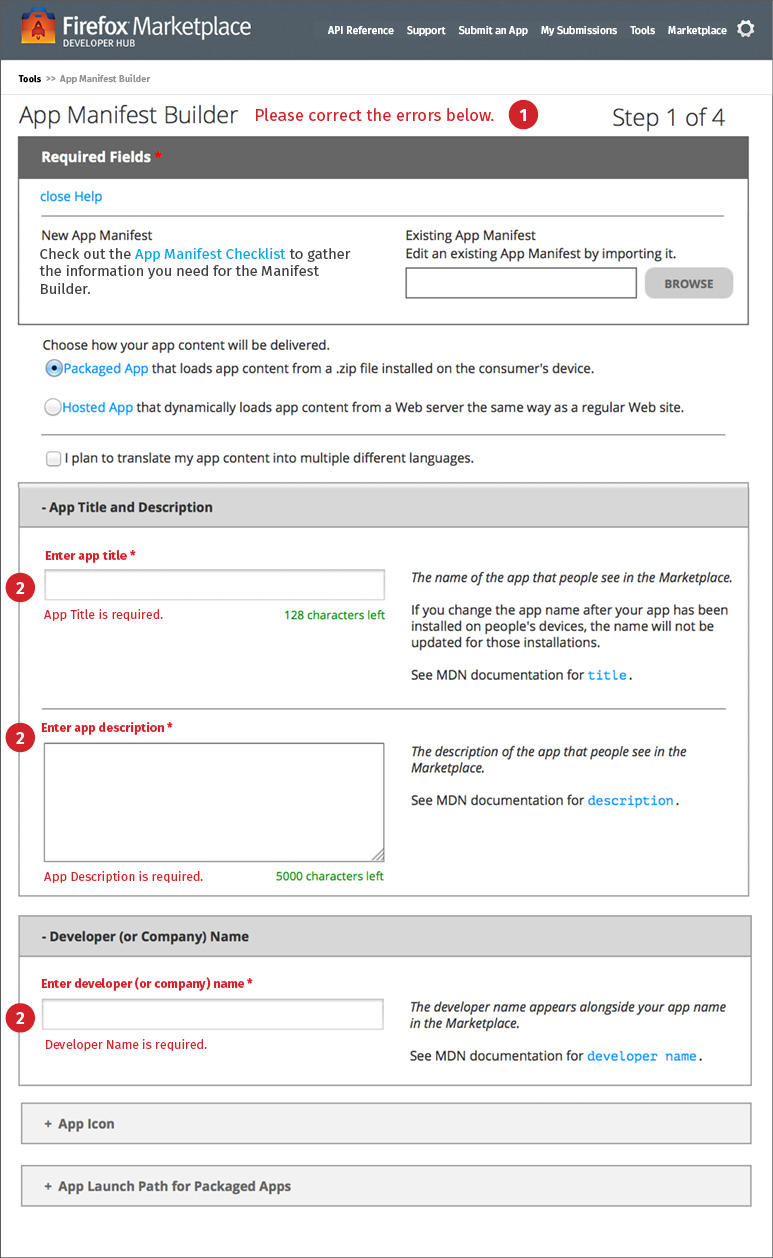
Required Field Errors only occur on Step 1, as this step is the only one with required fields. User cannot advance unless all fields are completed.
- General Error Message. Display general error message at top of page.
- Field Error Indicators. Open all the accordions that contain errors.
Display field label in bold red.
Display error message in regular red below field.
Manifest Builder - Inline Field Validation
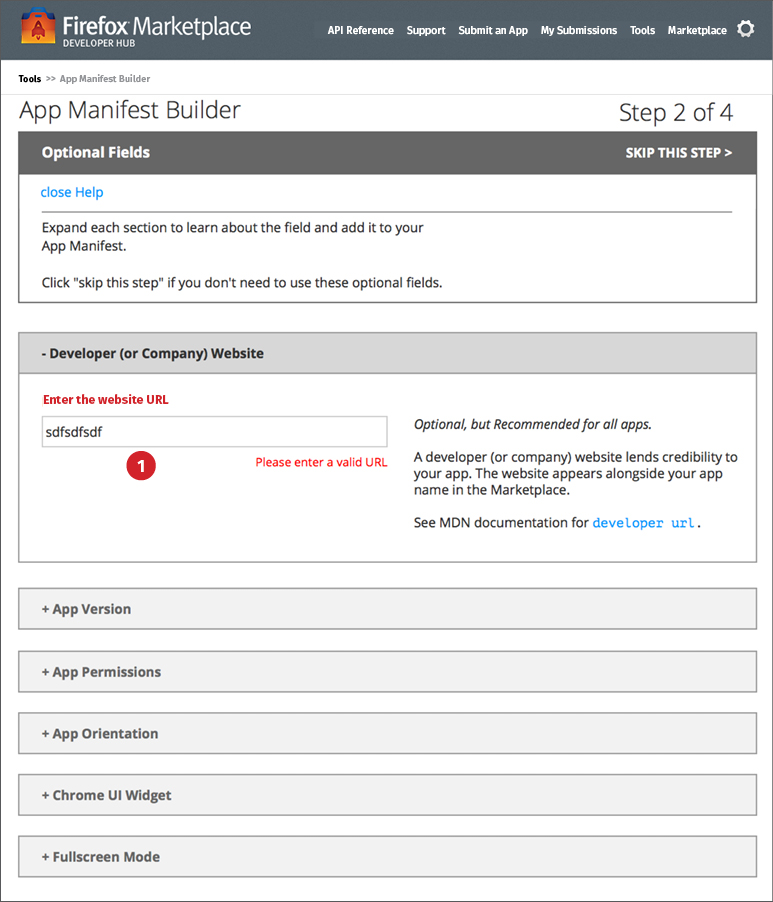
Inline field validation is used to confirm that user is submitting correctly formatted data.
- Field Validation. After user enters data, check Validation Rules.
If invalid, display field label in bold red and display validation message in regular red beneath the field.
Validation Rules are being finalized now. See this document:
https://docs.google.com/a/mozilla.com/spreadsheets/d/1f2yexSDm-XjSdz5B5KJmcBwLCA-c8tlebAaRgaGwKMk
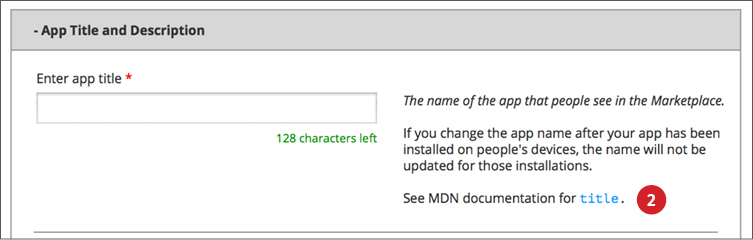
Manifest Builder - Character Counter - Start
Use character counters where field has a defined max length per Validation Rules
- Character Counter. Count down from defined max length.
Allow user to exceed the max length, so that user can copy-paste content into these fields and then edit it down.
When counter gets to negative numbers, display as in Character Counter - Negative below
Manifest Builder - Character Counter - Negative
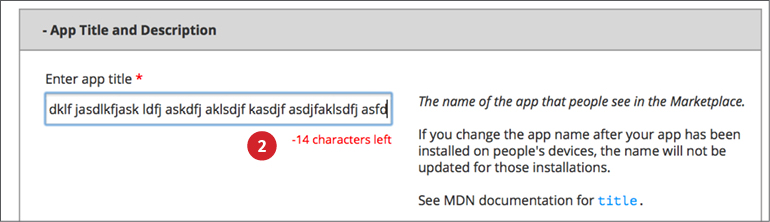
- Negative Character Count. Showing negative counter example.
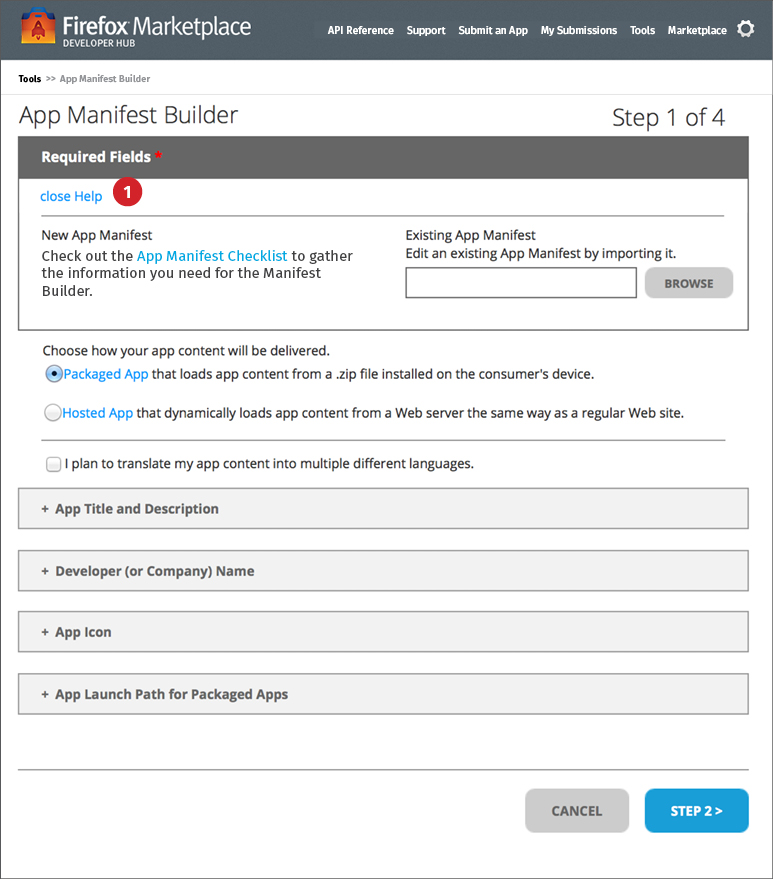
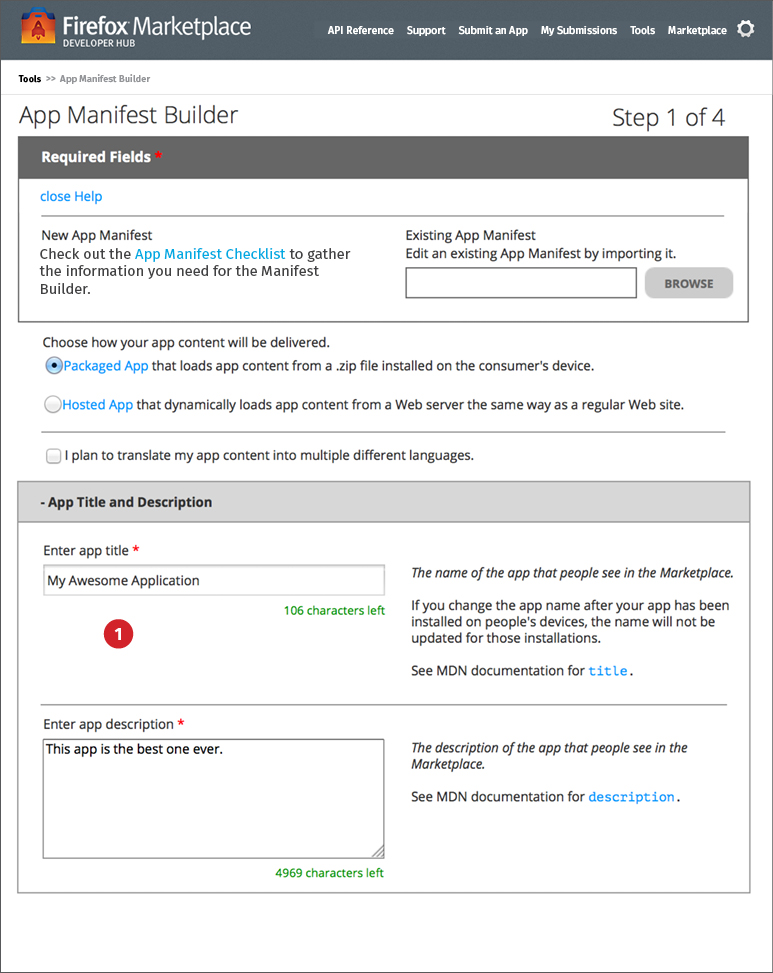
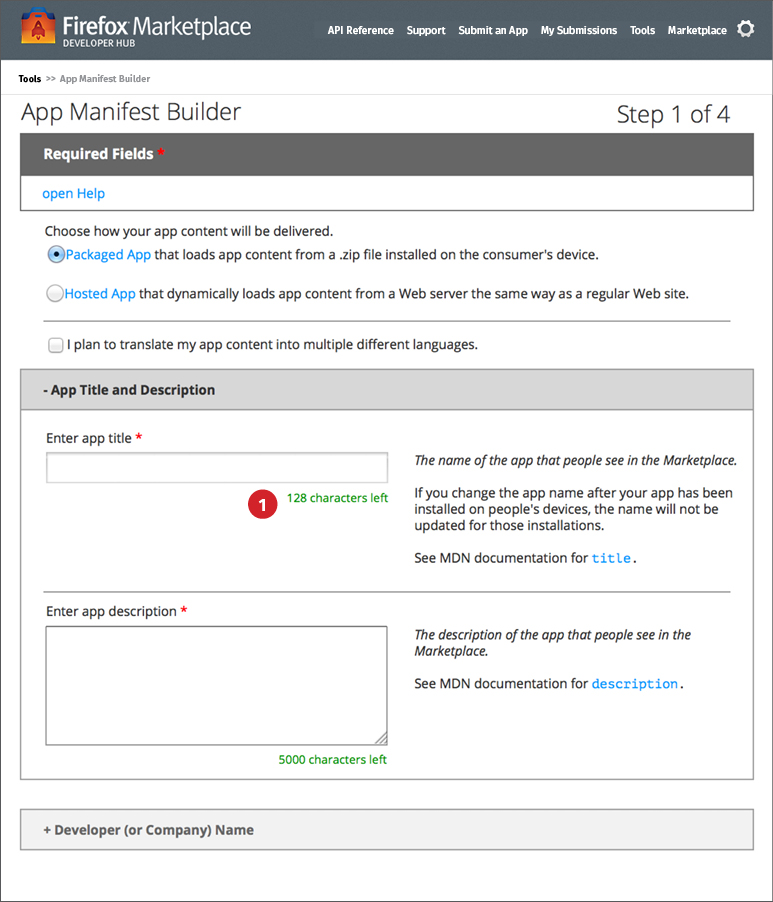
Manifest Builder - Step 1 - Default
On page load, defaul to "Packaged App" as Delivery Method.
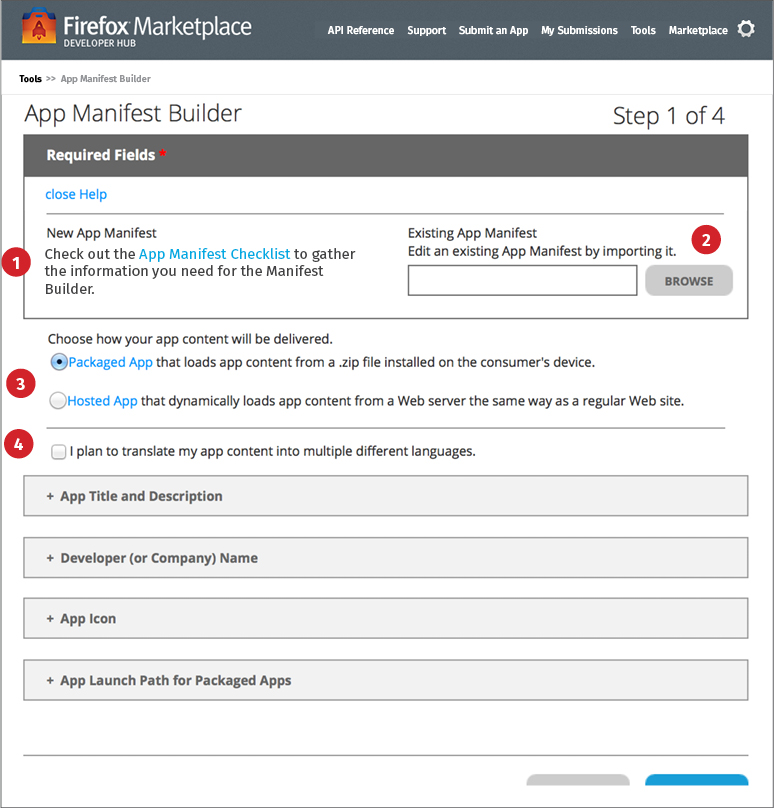
- Help Content. Include link to App Submission Checklist (content being developed). Click to open Checklist in a layer.
- Existing Manifest. Click "browse" to browse locally for an existing manifest file. See Imported Manifest.
- App Delivery Method. Default is Packaged App. See Step 1 - Hosted for example of Hosted App.
- Plan to Translate. Default is unchecked.
If checked, user will be able to add translated strings on Step 2.
- Step 1 Fields. See Step 1 Fields for details.
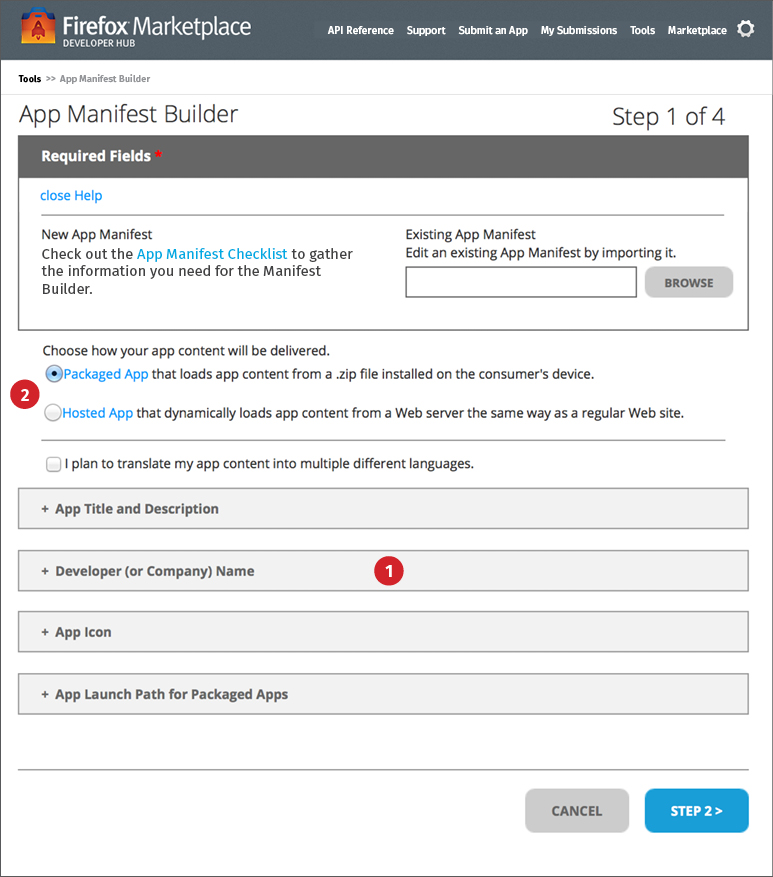
Manifest Builder - Step 1 - Hosted
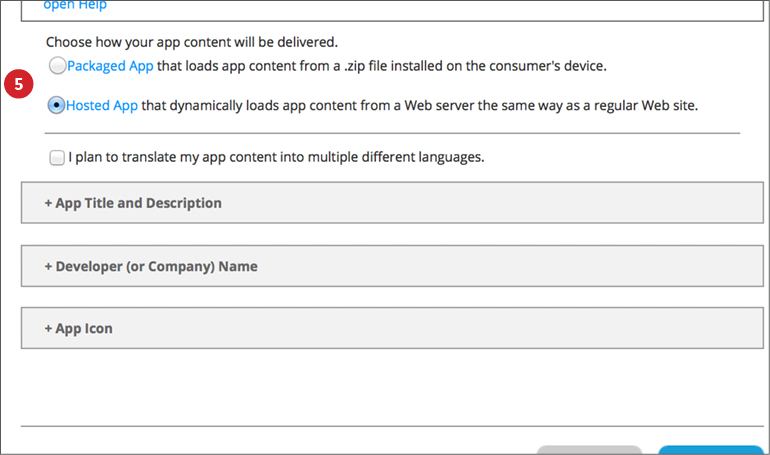
- Hosted App. Showing hosted selected.
Note that choosing "Hosted" removes the "App Launch Path for Packaged Apps" accordian from this step.
Manifest Builder - Step 1 - Imported Manifest
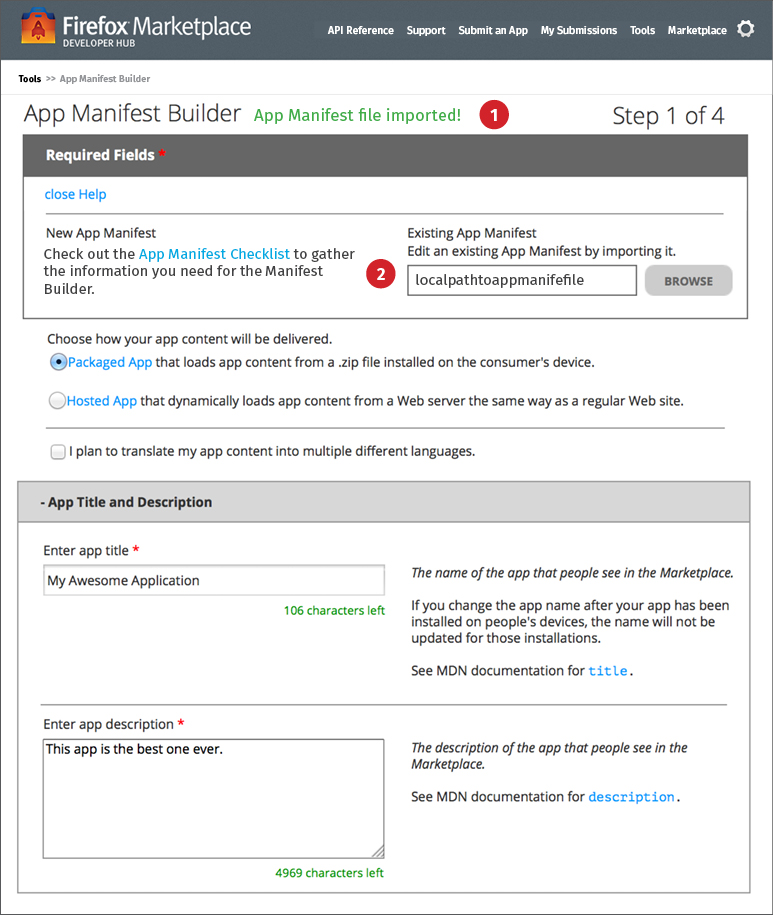
- Manifest Imported Confirmation Message. Display confirmation message when app manifest file has been imported.
- Import Path. Showing that user has imported an existing app manifest file.
The system populates the Manifest Builder fields with the data from the imported file. See, for example, the App Title and App Description fields shown here.
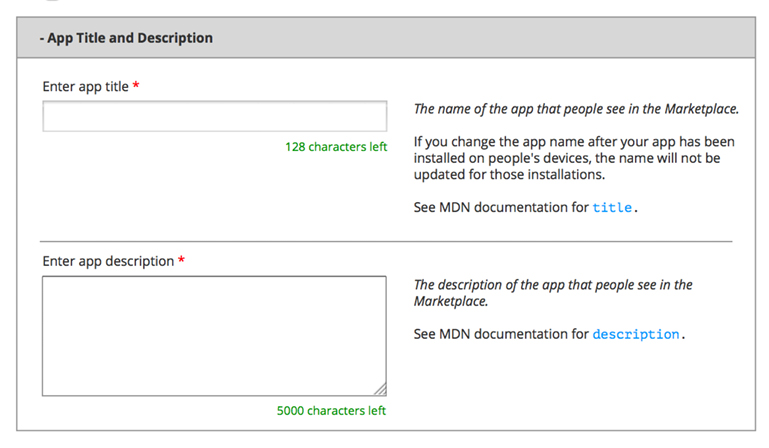
Manifest Builder - Step 1 - Fields
See this doc for more details on each field, including how Manifest Builder fields translate into manifest file fields.
![]()
App Icon. Each "icon set" consists of a dropdown selection, an input field, and an "add more" button.
After completing one icon set, user can display another empty icon set by clicking the button.
User will be able to delete a previously entered icon set.
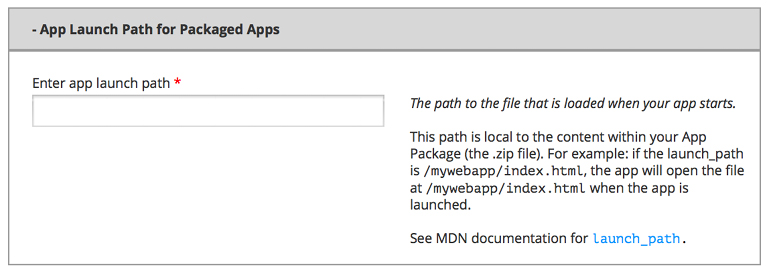
App Launch Path for Packaged Apps. Display only if Packaged App is selected as Delivery Method.
Manifest Builder - Step 2
- Help Content. This is the Help content for Step 2.
- Step 2 Fields. See Step 2 Fields for details.
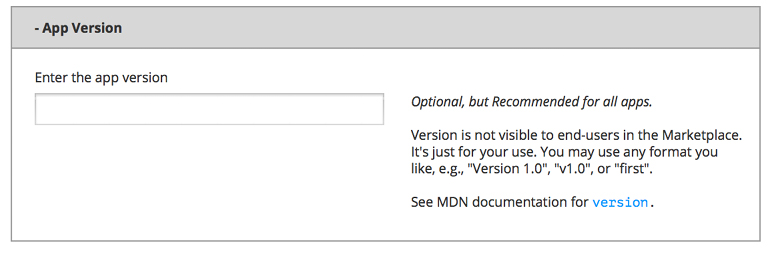
Manifest Builder - Step 2 - Fields
See this doc for more details on each field, including how Manifest Builder fields translate into manifest file fields.
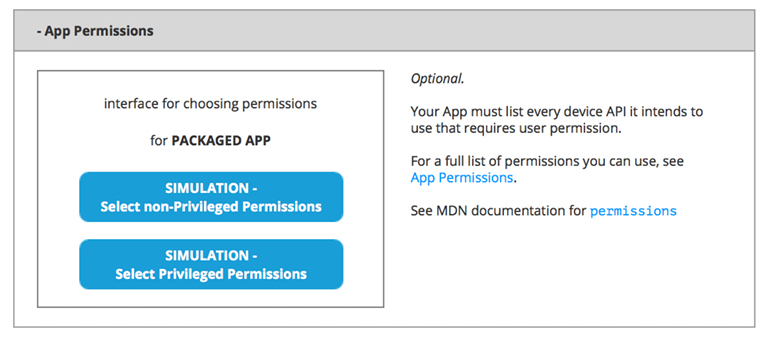
App Permissions. This interface is TBD - in progress.
If "hosted" is selected as the Delivery Method, display only permissions relevant to Hosted Apps.
If "packaged" is selected as the Delivery Method, display all available permissions.
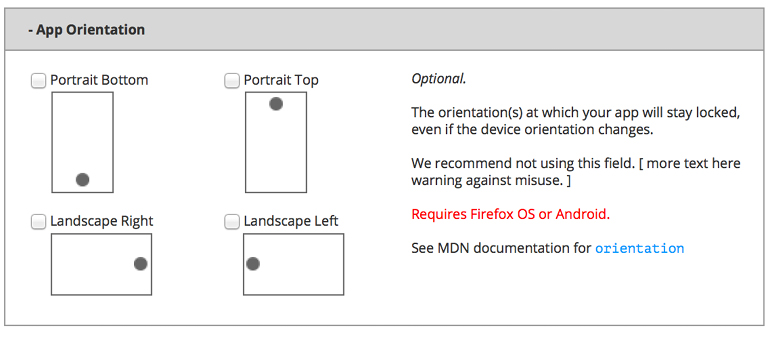
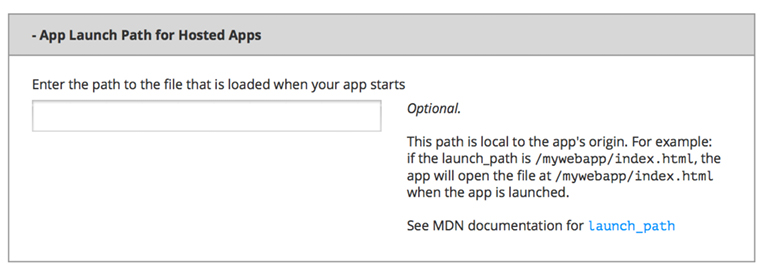
App Launch Path for Hosted Apps. Display only if Hosted App is selected as Delivery Method.
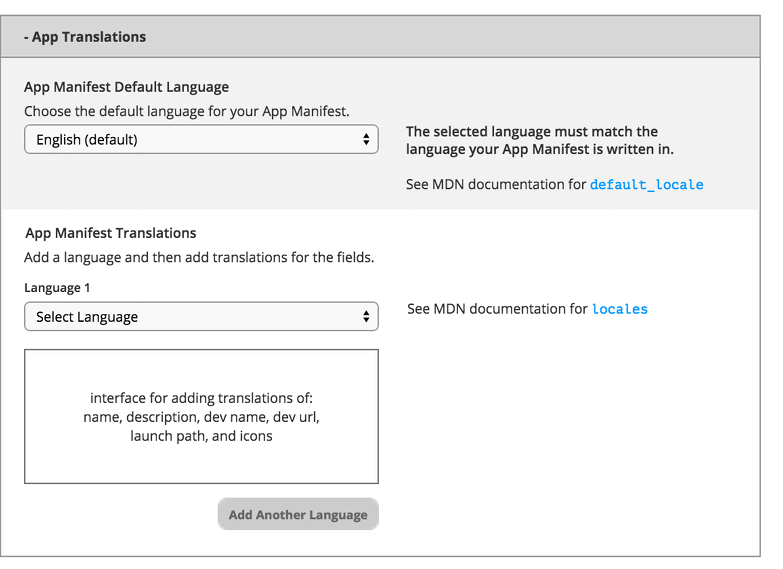
App Translations. This interface is TBD - in progress.
Display only if Plan to Translate is checked on Step 1.
Choose Default Language (converted into language code by system) and then complete a "locale set" for each language user wants to translate into.
Each locale set consists of a dropdown selection (converted into language code by system), a set of 6 input fields, and an "add more" button.
After completing one locale set, user can display another empty locale set by clicking the button.
User will be able to delete a previously entered locale set.
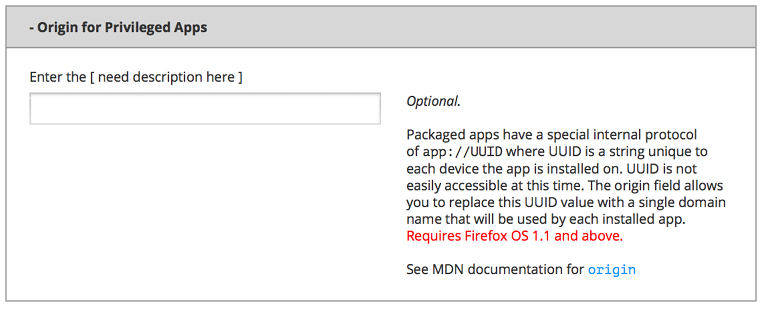
Origin for Privileged Apps. Display only if Packaged App is selected as the Delivery Method AND at least one Privileged Permission is selected on Step 2.
Manifest Builder - Step 3
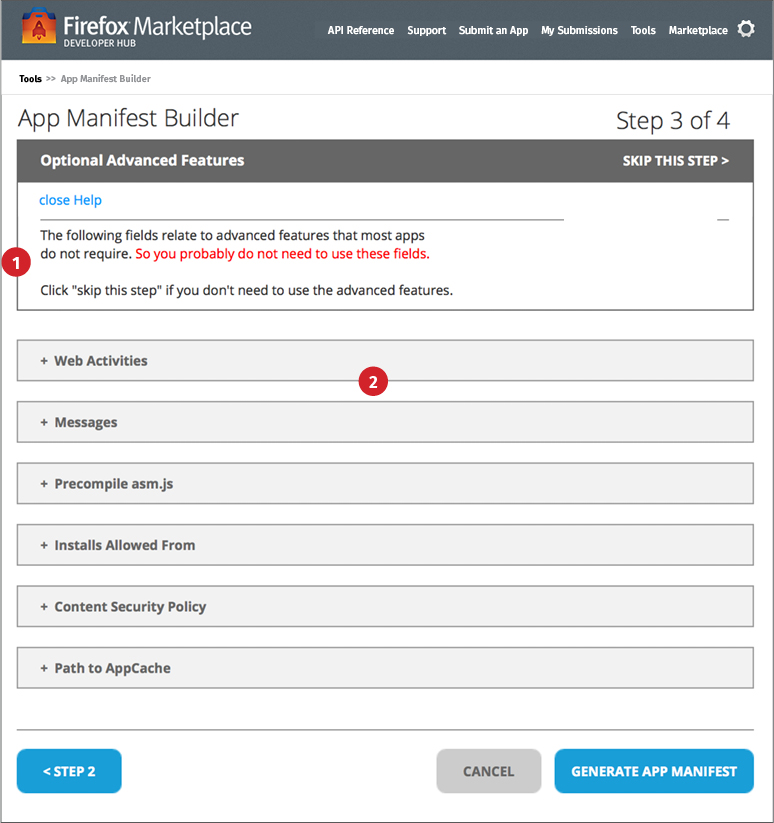
- Help Content. This is the Help content for Step 3.
- Step 3 Fields. See Step 3 Fields for details.
Manifest Builder - Step 3 - Fields
See this doc for more details on each field, including how Manifest Builder fields translate into manifest file fields.
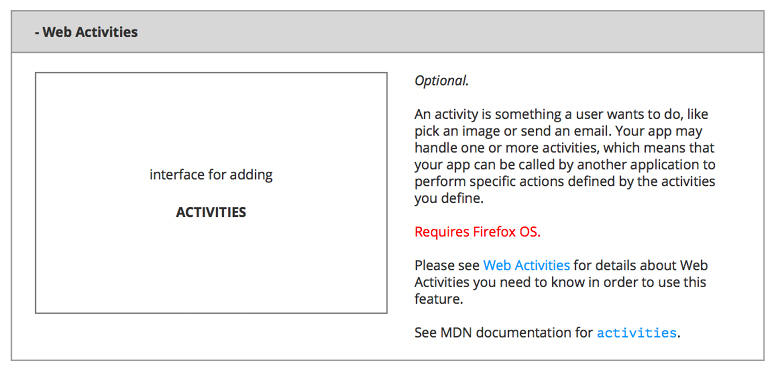
Web Activities. This interface is TBD - in progress.
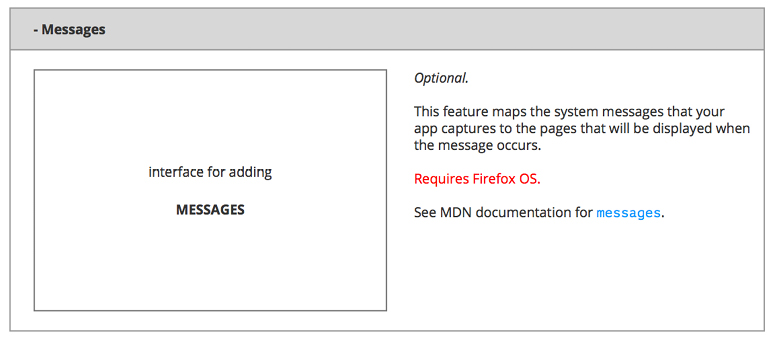
Messages. This interface is TBD - in progress.
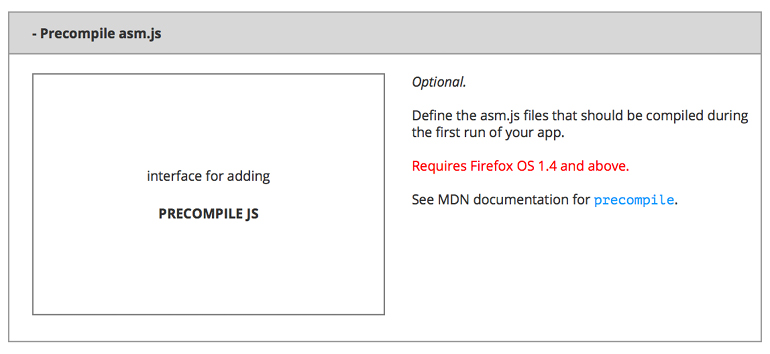
Precompile asm.js. This interface is TBD - in progress.
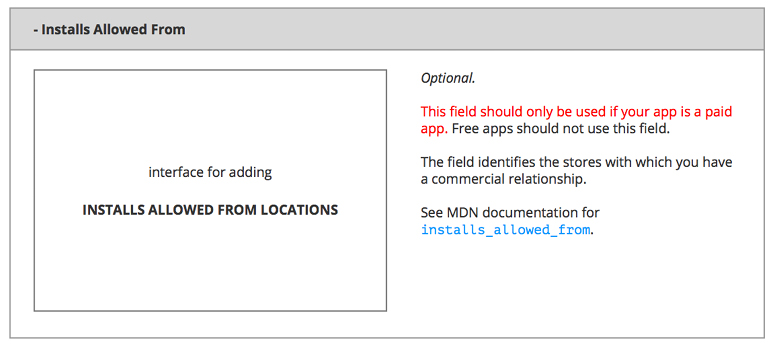
Installs Allowed From. This interface is TBD - in progress.

Content Security Policy. This interface is TBD - in progress.
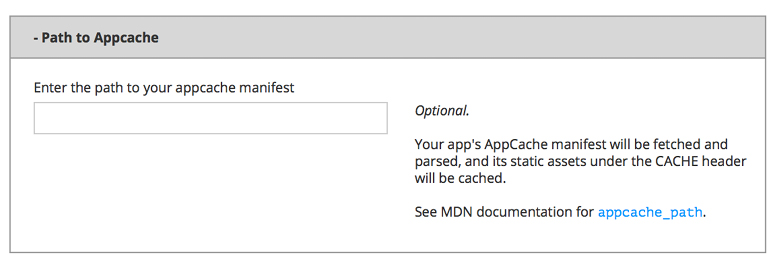
Path to AppCache. Display only if Hosted App is selected as the Delivery Method.

App Redirects. Display only if Packaged App is selected as the Delivery Method AND at least one Privileged Permission is selected on Step 2.
Manifest Builder - Step 4
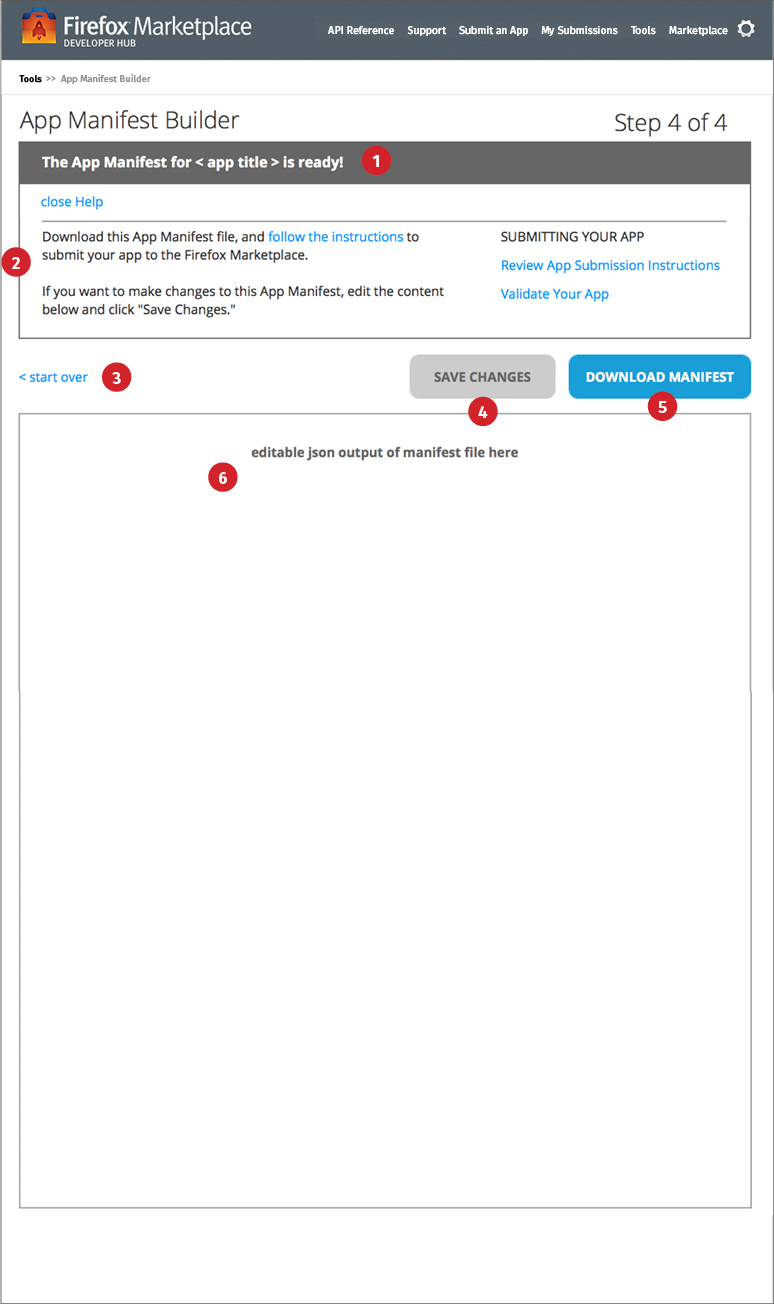
- Ready message. Display the App Title in this ready message.
- Help Content. "Follow instructions" and "Review App Submission instructions" go to this MDN page. Validate App link goes to App Validator.
- Start Over. Clears all entered data and returns user to Step 1.
- Save Changes. User can edit the generated manifest on this page (see #6). When done editing, user clicks "Save Changes."
- Download Manifest. User can download the generated (or saved) manifest as a JSON file.
- Edit Area. Clicking into and making a change in this area disables the Download Manifest button. User then clicks "Save Changes," which re-enables the Download Manifest button.